
Hi all,
As maybe some of you know i have received a poor aga campolin Maltese from a webstore: viewtopic.php?t=80049
First it was more esthetisch things like gaps etcetera but know i also have a mechanical issue. The blade doesnt fully open. The spring is good, a lot of tension in it. I think the problem lays in the button. The pin that locks the blade in place is far to deep so when blade releases, the spring thouches the notch of that button and slows down the speed of the spring.
So i want to take apart everything to fix it. My question: Whats the best way to remove the head of rivets without damaging the horn handles? Or can i make a small groove in the top of the spring so it doesnt touch that notch anymore?
How to take out rivets without damaging the horn handles
-
Clack

- Posts: 52
- Joined: Wed Jul 26, 2023 10:09 pm
-
Pile Driver
- Posts: 367
- Joined: Mon May 15, 2017 5:18 pm
- Location: North Shore MA
Re: How to take out rivets without damaging the horn handles
thats a gross amount of daylight
-
Killgar

- Posts: 291
- Joined: Mon May 23, 2022 6:28 am
Re: How to take out rivets without damaging the horn handles
When I build a switchblade and I know the spring will cross paths with the sear, I always cut a relief into the spring (pic below).
As for removing pins, first, if one end of the pin extends well above the handle scale, I tape off the handle and CAREFULLY file the head of the pin down, then I use a pin punch to push it out.
But if the end doesn't extend high enough, I tap a small divot into the center of the end/head of the pin with a finely pointed punch, and then use a drill press to drill the head of the pin off (slowest speed). Then use a pin punch to push the pin out. But this is dicey work.
As far as AGA Campolin knives, I've owned two, both had serious problems. I fixed one that was fixable, and completely rebuilt the other into a new knife.
You might want to consider paying a professional like Bill DeShivs to overhaul your knife. Of course I can understand wanting to do it yourself, that's how I started.
As for customer service from the Italian makers, good luck, from what I've read over the years, your experience is not uncommon. Similar examples from people trying to get a refund from the Beltrames. The idea that because they are hand-made a person should have to accept a seriously flawed knife, and/or one that doesn't function properly, is a crock.
- Attachments
-
-
Avatar- Ti-lite auto conversion. Video- https://www.youtube.com/watch?v=q79nia-_DzU
My Youtube knife channel- https://www.youtube.com/@killgar2621/videos
My Youtube knife channel- https://www.youtube.com/@killgar2621/videos
-
Bill DeShivs

- Silver Tier

- Posts: 926
- Joined: Sun Oct 07, 2012 4:57 am
- Contact:
Re: How to take out rivets without damaging the horn handles
Your diagnosis is probably incorrect. It looks like the backspring pin is not fully peened, allowing the liners to bow at the font.
Post a picture of the knife open, showing the full spine.
Taking one of these apart is not a job for someone who has never done so. It should be avoided if possible.
Post a picture of the knife open, showing the full spine.
Taking one of these apart is not a job for someone who has never done so. It should be avoided if possible.
Bill DeShivs, Master Cutler
Factory authorized repair for:
Latama
Mauro Mario
LePre
Colonial
KABAR
Hubertus, Grafrath, Ritter
Schrade Cut. Co., Geo Schrade, Pressbutton, Flylock
Falcon/AKC/AGA Campolin
Puma
Burrell Cutlery
Factory authorized repair for:
Latama
Mauro Mario
LePre
Colonial
KABAR
Hubertus, Grafrath, Ritter
Schrade Cut. Co., Geo Schrade, Pressbutton, Flylock
Falcon/AKC/AGA Campolin
Puma
Burrell Cutlery
-
Clack
- Posts: 52
- Joined: Wed Jul 26, 2023 10:09 pm
Re: How to take out rivets without damaging the horn handles
I think cutting a small relief like you shown in the pics will do the job..Killgar wrote: ↑Fri Sep 08, 2023 6:10 pm When I build a switchblade and I know the spring will cross paths with the sear, I always cut a relief into the spring (pic below).
As for removing pins, first, if one end of the pin extends well above the handle scale, I tape off the handle and CAREFULLY file the head of the pin down, then I use a pin punch to push it out.
But if the end doesn't extend high enough, I tap a small divot into the center of the end/head of the pin with a finely pointed punch, and then use a drill press to drill the head of the pin off (slowest speed). Then use a pin punch to push the pin out. But this is dicey work.
As far as AGA Campolin knives, I've owned two, both had serious problems. I fixed one that was fixable, and completely rebuilt the other into a new knife.
You might want to consider paying a professional like Bill DeShivs to overhaul your knife. Of course I can understand wanting to do it yourself, that's how I started.
As for customer service from the Italian makers, good luck, from what I've read over the years, your experience is not uncommon. Similar examples from people trying to get a refund from the Beltrames. The idea that because they are hand-made a person should have to accept a seriously flawed knife, and/or one that doesn't function properly, is a crock.
Would love to send it to him but shipping cost from EU to US + labor costs etc. would be more than what i have paid for the knife lol.
So that is unfortunately not an option
-
Clack
- Posts: 52
- Joined: Wed Jul 26, 2023 10:09 pm
Re: How to take out rivets without damaging the horn handles
But you can also regularly feel that the button needs to be pressed very deeply.Bill DeShivs wrote: ↑Fri Sep 08, 2023 7:28 pm Your diagnosis is probably incorrect. It looks like the backspring pin is not fully peened, allowing the liners to bow at the font.
Post a picture of the knife open, showing the full spine.
Taking one of these apart is not a job for someone who has never done so. It should be avoided if possible.
The pin goes over the blade and then comes into contact with the spring.
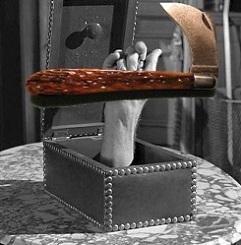
I made some pictures and a video so you can have a better look.
- Attachments
-
-
-
Madmarco
- Gold Tier

- Posts: 12039
- Joined: Wed May 20, 2020 12:09 am
- Location: Smack dab in the middle of Canada
Re: How to take out rivets without damaging the horn handles
I would listen closely and heed the advise that's been offered, Clack. I received a brand new AGA 11" Maltese just like yours and it arrived with problems. When I told the seller about them he said, "With handmade Italian knives their success or failure depends on how much vino the maker drank before during and after he worked on it." He also said the makers are now 80 year old men whose eyes aren't what they use to be, so your taking your chances with Italian knives. I'd have returned it but the seller didn't accept returns. He's outta business now.
I didn't do what Bill suggested and took mine apart 3 separate times cuz I couldn't get everything just right, and eventually sent it to Muskratman to repair and reassemble, and he sent it back in top-notch condition with everything working as was intended. While it was apart I had M-man install a custom button and eliminate the safety. Should have done all this in the first place.
What happened to returning it, that seemed like the best solution? That being said, I certainly understand your eagerness to do the work yourself. Good luck whatever you do!
 `
`
I didn't do what Bill suggested and took mine apart 3 separate times cuz I couldn't get everything just right, and eventually sent it to Muskratman to repair and reassemble, and he sent it back in top-notch condition with everything working as was intended. While it was apart I had M-man install a custom button and eliminate the safety. Should have done all this in the first place.
What happened to returning it, that seemed like the best solution? That being said, I certainly understand your eagerness to do the work yourself. Good luck whatever you do!
-
Bill DeShivs
- Silver Tier
- Posts: 926
- Joined: Sun Oct 07, 2012 4:57 am
- Contact:
Re: How to take out rivets without damaging the horn handles
Duplicate post. Sorry.
Bill DeShivs, Master Cutler
Factory authorized repair for:
Latama
Mauro Mario
LePre
Colonial
KABAR
Hubertus, Grafrath, Ritter
Schrade Cut. Co., Geo Schrade, Pressbutton, Flylock
Falcon/AKC/AGA Campolin
Puma
Burrell Cutlery
Factory authorized repair for:
Latama
Mauro Mario
LePre
Colonial
KABAR
Hubertus, Grafrath, Ritter
Schrade Cut. Co., Geo Schrade, Pressbutton, Flylock
Falcon/AKC/AGA Campolin
Puma
Burrell Cutlery
-
Bill DeShivs
- Silver Tier
- Posts: 926
- Joined: Sun Oct 07, 2012 4:57 am
- Contact:
Re: How to take out rivets without damaging the horn handles
OK-
First: That's not how you should open a switchblade. The knife should be held firmly in your hand, with your fingers holding the handle tightly.
It's that old physics thing about for every action there is an equal and opposite reaction.
Here is a video: https://www.youtube.com/watch?v=S5RrsH7-CqA&t=10s
The spring being held down by the button is actually pretty normal, but releasing it by pressing the button can result in a broken spring. The button catching the spring is not why your knife is not opening fully.
Has the pivot been lubricated? Here's a tip: the spring will usually ride against one of the liners. Put a drop of oil on that side of the spring.
I can see gaps on the handle that probably need to be closed properly.
Regardless- until you learn to properly open your knife, not much will help.
Bill DeShivs, Master Cutler
Factory authorized repair for:
Latama
Mauro Mario
LePre
Colonial
KABAR
Hubertus, Grafrath, Ritter
Schrade Cut. Co., Geo Schrade, Pressbutton, Flylock
Falcon/AKC/AGA Campolin
Puma
Burrell Cutlery
Factory authorized repair for:
Latama
Mauro Mario
LePre
Colonial
KABAR
Hubertus, Grafrath, Ritter
Schrade Cut. Co., Geo Schrade, Pressbutton, Flylock
Falcon/AKC/AGA Campolin
Puma
Burrell Cutlery
-
Clack
- Posts: 52
- Joined: Wed Jul 26, 2023 10:09 pm
Re: How to take out rivets without damaging the horn handles
Yeah, i will follow that advise. Its not that i'm not handy because i'm a mechanic myself and work with many tools but it would be better if i try things on a much cheaper knife to gain some experience in it.Madmarco wrote: ↑Sat Sep 09, 2023 2:31 am I would listen closely and heed the advise that's been offered, Clack. I received a brand new AGA 11" Maltese just like yours and it arrived with problems. When I told the seller about them he said, "With handmade Italian knives their success or failure depends on how much vino the maker drank before during and after he worked on it." He also said the makers are now 80 year old men whose eyes aren't what they use to be, so your taking your chances with Italian knives. I'd have returned it but the seller didn't accept returns. He's outta business now.
I didn't do what Bill suggested and took mine apart 3 separate times cuz I couldn't get everything just right, and eventually sent it to Muskratman to repair and reassemble, and he sent it back in top-notch condition with everything working as was intended. While it was apart I had M-man install a custom button and eliminate the safety. Should have done all this in the first place.
What happened to returning it, that seemed like the best solution? That being said, I certainly understand your eagerness to do the work yourself. Good luck whatever you do!
8)WIN_20230908_21_28_14_Pro.jpgWIN_20230908_21_28_28_Pro.jpg`
I pretty believe that they are still working on old fashion and that the knife makers are pretty old. Especially on the Campolin factory. Dont know who makes the knives now for them. The youth there not interested in learning to make traditional knives? But the way Angelo treat their custommers is not really a good sign for the company's future.
I'm glad your knife ended up with good results. Looking beautiful
-
Clack
- Posts: 52
- Joined: Wed Jul 26, 2023 10:09 pm
Re: How to take out rivets without damaging the horn handles
Yes Bill, you are completely right. I notice the difference immediately. No misfires now anymore. Still need the press pretty hard on the button but i can live with that.Bill DeShivs wrote: ↑Sat Sep 09, 2023 6:30 am OK-
First: That's not how you should open a switchblade. The knife should be held firmly in your hand, with your fingers holding the handle tightly.
It's that old physics thing about for every action there is an equal and opposite reaction.
Here is a video: https://www.youtube.com/watch?v=S5RrsH7-CqA&t=10s
The spring being held down by the button is actually pretty normal, but releasing it by pressing the button can result in a broken spring. The button catching the spring is not why your knife is not opening fully.
Has the pivot been lubricated? Here's a tip: the spring will usually ride against one of the liners. Put a drop of oil on that side of the spring.
I can see gaps on the handle that probably need to be closed properly.
Regardless- until you learn to properly open your knife, not much will help.
Yes i also followed the instructions from knifeshop with dropping a bit quick release oil on the pivot and locking hole but didnt noticed a difference. There is a small clearance between the spring and liners so it doesnt touch it at all.
Last question. If you look close to the video you see that i can push the handle down and make the gap smaller. However there is some tension on the handle. Probably the fit of the handle between the bolsters is too tight. Is it still possible to hammer slightly on the rivet head to bring the handle closer to the liner? Will this cause a crack? Thank you.
-
Bill DeShivs
- Silver Tier
- Posts: 926
- Joined: Sun Oct 07, 2012 4:57 am
- Contact:
Re: How to take out rivets without damaging the horn handles
Yes you can peen the rivet, but it's too long. It needs to be filed shorter, then peened.
Use a small hammer (tack hammer or smaller) and place the other side of the pin on an anvil or other piece of steel. After shortening the rivet, hold the handles together and gently tap the rivet-going around the edges creating a head, then occasionally hitting the center. Take your time, be gentle, and don't go too far.
Use a small hammer (tack hammer or smaller) and place the other side of the pin on an anvil or other piece of steel. After shortening the rivet, hold the handles together and gently tap the rivet-going around the edges creating a head, then occasionally hitting the center. Take your time, be gentle, and don't go too far.
Bill DeShivs, Master Cutler
Factory authorized repair for:
Latama
Mauro Mario
LePre
Colonial
KABAR
Hubertus, Grafrath, Ritter
Schrade Cut. Co., Geo Schrade, Pressbutton, Flylock
Falcon/AKC/AGA Campolin
Puma
Burrell Cutlery
Factory authorized repair for:
Latama
Mauro Mario
LePre
Colonial
KABAR
Hubertus, Grafrath, Ritter
Schrade Cut. Co., Geo Schrade, Pressbutton, Flylock
Falcon/AKC/AGA Campolin
Puma
Burrell Cutlery
-
Clack
- Posts: 52
- Joined: Wed Jul 26, 2023 10:09 pm
Re: How to take out rivets without damaging the horn handles
Thanks man! I will tryBill DeShivs wrote: ↑Sat Sep 09, 2023 7:29 pm Yes you can peen the rivet, but it's too long. It needs to be filed shorter, then peened.
Use a small hammer (tack hammer or smaller) and place the other side of the pin on an anvil or other piece of steel. After shortening the rivet, hold the handles together and gently tap the rivet-going around the edges creating a head, then occasionally hitting the center. Take your time, be gentle, and don't go too far.
-
Madmarco
- Gold Tier
- Posts: 12039
- Joined: Wed May 20, 2020 12:09 am
- Location: Smack dab in the middle of Canada
Re: How to take out rivets without damaging the horn handles
I might be mistaken, K.G., but my understanding is, by creating a "relief" pathway to the catch hole is referred to as "ramping", which makes sense since that's actually what it is, a ramp to the hole. I'd say it saves wear and tear on the sear-tip as well.Killgar wrote: ↑Fri Sep 08, 2023 6:10 pm When I build a switchblade and I know the spring will cross paths with the sear, I always cut a relief into the spring (pic below).
As for removing pins, first, if one end of the pin extends well above the handle scale, I tape off the handle and CAREFULLY file the head of the pin down, then I use a pin punch to push it out.
But if the end doesn't extend high enough, I tap a small divot into the center of the end/head of the pin with a finely pointed punch, and then use a drill press to drill the head of the pin off (slowest speed). Then use a pin punch to push the pin out. But this is dicey work.
As far as AGA Campolin knives, I've owned two, both had serious problems. I fixed one that was fixable, and completely rebuilt the other into a new knife.
You might want to consider paying a professional like Bill DeShivs to overhaul your knife. Of course I can understand wanting to do it yourself, that's how I started.
As for customer service from the Italian makers, good luck, from what I've read over the years, your experience is not uncommon. Similar examples from people trying to get a refund from the Beltrames. The idea that because they are hand-made a person should have to accept a seriously flawed knife, and/or one that doesn't function properly, is a crock.
Like I said, I might be wrong!
-
Madmarco
- Gold Tier
- Posts: 12039
- Joined: Wed May 20, 2020 12:09 am
- Location: Smack dab in the middle of Canada
Re: How to take out rivets without damaging the horn handles
Thanks for your compliment about my knife, Clack, I hope it all works out for you and your knife!Clack wrote: ↑Sat Sep 09, 2023 10:26 amYeah, i will follow that advise. Its not that i'm not handy because i'm a mechanic myself and work with many tools but it would be better if i try things on a much cheaper knife to gain some experience in it.Madmarco wrote: ↑Sat Sep 09, 2023 2:31 am I would listen closely and heed the advise that's been offered, Clack. I received a brand new AGA 11" Maltese just like yours and it arrived with problems. When I told the seller about them he said, "With handmade Italian knives their success or failure depends on how much vino the maker drank before during and after he worked on it." He also said the makers are now 80 year old men whose eyes aren't what they use to be, so your taking your chances with Italian knives. I'd have returned it but the seller didn't accept returns. He's outta business now.
I didn't do what Bill suggested and took mine apart 3 separate times cuz I couldn't get everything just right, and eventually sent it to Muskratman to repair and reassemble, and he sent it back in top-notch condition with everything working as was intended. While it was apart I had M-man install a custom button and eliminate the safety. Should have done all this in the first place.
What happened to returning it, that seemed like the best solution? That being said, I certainly understand your eagerness to do the work yourself. Good luck whatever you do!
8)WIN_20230908_21_28_14_Pro.jpgWIN_20230908_21_28_28_Pro.jpg`
I pretty believe that they are still working on old fashion and that the knife makers are pretty old. Especially on the Campolin factory. Dont know who makes the knives now for them. The youth there not interested in learning to make traditional knives? But the way Angelo treat their custommers is not really a good sign for the company's future.
I'm glad your knife ended up with good results. Looking beautiful
-
Killgar
- Posts: 291
- Joined: Mon May 23, 2022 6:28 am
Re: How to take out rivets without damaging the horn handles
I might be mistaken, K.G., but my understanding is, by creating a "relief" pathway to the catch hole is referred to as "ramping", which makes sense since that's actually what it is, a ramp to the hole. I'd say it saves wear and tear on the sear-tip as well.
Like I said, I might be wrong!
[/quote]
I think we're talking about two different things.
The first picture below is the same knife I posted earlier. I ground the edge of the ricasso in front of the catch hole at an angle (red arrow) so that when closing the knife the tip of the sear would pass more smoothly over the edge of the ricasso. I refer to such a thing as a "relief ramp".
In my earlier post I was referring to a "relief" ground into the side of the kick spring near the tip (second pic below). This isn't a "ramp" so much as it's a concave groove.
The reason I put a relief in the spring goes like this-
First, unlike classic Italian switchblades where the sides of the blade tang rub directly against the liners, I install bronze phosphor pivot washers in all of my switchblades to reduce friction. This enables me to achieve a tighter pivot with no blade play because the combination of the washers and a good lubricant significantly reduce friction and allow a faster opening of the knife even when the pivot is snug.
As a result of the addition of the washers, there is a slight gap between the sides of the tang and the liners when the knife is closed. This requires the tip of the sear to be a little longer to adequately engage the blade catch hole.
Also, I like the tips of my sears to be as long as functionally possible because I don't like a switchblade with a hair-trigger. I prefer that the button need be pressed deep into the handle to fire the knife.
Due to the tip of the sear being longer, depending on the individual knife, sometimes the sear doesn't rise all the way up into the liner sear hole when the knife is fired, leaving the very tip of the sear protruding out slightly in between the liners, and in the path of the spring. I grind the relief in the spring so that it will pass smoothly over the protruding tip of the sear instead of slamming into the sear.
This is just my personal style of making switchblades. I learned long ago that making switchblades involves a certain amount of compromise and compensation. In order to have things one way, you sometimes have to compromise and compensate in other ways. I like pivot washers and snug pivots, and I don't like hair-triggers, this requires longer sears, which in turn requires a relief to be ground into the springs
This knife can be seen being fired at the end of this video- https://www.youtube.com/watch?v=k1ZkW3HMVaM Each of the knives in the video features the characteristics I've described in this post, bronze phosphor pivot washers, extra long sears, and relief cuts in the springs.
- Attachments
-
-
Avatar- Ti-lite auto conversion. Video- https://www.youtube.com/watch?v=q79nia-_DzU
My Youtube knife channel- https://www.youtube.com/@killgar2621/videos
My Youtube knife channel- https://www.youtube.com/@killgar2621/videos
-
Madmarco
- Gold Tier
- Posts: 12039
- Joined: Wed May 20, 2020 12:09 am
- Location: Smack dab in the middle of Canada
Re: How to take out rivets without damaging the horn handles
I hear ya, KG, and you make perfect sense.
I think we're on the same page, just slightly different terminology.
I simply can't get enough of seeing your builds, they are sensational!
I think we're on the same page, just slightly different terminology.
I simply can't get enough of seeing your builds, they are sensational!
-
Clack
- Posts: 52
- Joined: Wed Jul 26, 2023 10:09 pm
Re: How to take out rivets without damaging the horn handles
Hi all, little update. Just worked on the handles and have succeed to reduce the gap a little bit without cracking the scales. The rivet heads are not that nice and round now but after some scotch brite and polish it turned out ok. Also did a quick polish on the blade.
Unfortunately created little scratches on the handles around the rivets. Tryed to file the sharp edges of that rivet heads down a bit.
Unfortunately created little scratches on the handles around the rivets. Tryed to file the sharp edges of that rivet heads down a bit.
- Attachments
-
- 1
-
- 2
-
- 3
-
- 4
-
- 5
-
- 6
-
- 7
-
- 8
-
- 9
-
- 10
-
Clack
- Posts: 52
- Joined: Wed Jul 26, 2023 10:09 pm
-
Bill DeShivs
- Silver Tier
- Posts: 926
- Joined: Sun Oct 07, 2012 4:57 am
- Contact:
Re: How to take out rivets without damaging the horn handles
If you had a buffer, you could make those heads look much better.
Did closing the gap help the operation?
Did closing the gap help the operation?
Bill DeShivs, Master Cutler
Factory authorized repair for:
Latama
Mauro Mario
LePre
Colonial
KABAR
Hubertus, Grafrath, Ritter
Schrade Cut. Co., Geo Schrade, Pressbutton, Flylock
Falcon/AKC/AGA Campolin
Puma
Burrell Cutlery
Factory authorized repair for:
Latama
Mauro Mario
LePre
Colonial
KABAR
Hubertus, Grafrath, Ritter
Schrade Cut. Co., Geo Schrade, Pressbutton, Flylock
Falcon/AKC/AGA Campolin
Puma
Burrell Cutlery
-
Clack
- Posts: 52
- Joined: Wed Jul 26, 2023 10:09 pm
Re: How to take out rivets without damaging the horn handles
Not really. Sometimes it fires hard, sometimes medium to medium-slow. There was a moment i couldnt even push the button down.Bill DeShivs wrote: ↑Sat Sep 16, 2023 10:05 pm If you had a buffer, you could make those heads look much better.
Did closing the gap help the operation?
There is just something not right with the release mechanism. Or the pin is too long or the spring of the lever mechanism is too weak.
I already cleaned the hinges etc. with metal clean solution to remove al the leftover residue from old oil and dirt. So thats not really the problem now.
-
Killgar
- Posts: 291
- Joined: Mon May 23, 2022 6:28 am
Re: How to take out rivets without damaging the horn handles
Trying to diagnose a switchblade online is difficult to say the least.
You say that sometimes you cant push the button down, is this only when the knife is closed, or are there times when you cannot push it down when the knife is open?
If it only happens when the knife is closed, when the blade is pressing against the sear, and the sear is pressing against the inside of the sear-hole in the liner, then there could be a burr or rough spot either on the sear beak, inside the liner sear-hole, or inside the blades catch-hole that is causing the sear to occasionally bind. It only takes the slightest imperfection in one of these areas to cause binding.
If the blade catch-hole was drilled, then it will have circular/corkscrew-like striations inside it. Those striations can sometimes grip onto the sear beak when the blade is under pressure from the spring. This can cause binding that prevents the sear from rising (and the button being pressed). If the cause of the problem is roughness in the blade catch-hole, then it may be possible to smooth out the inside of the hole using very fine sandpaper wrapped around the back end of a drill bit of appropriate size, twisting the paper-wrapped bit around inside the hole. I would likely start with 2000 grit and finish with 2500 grit. Such fine grits are available in the paint sections of auto care stores. I wouldn't call this "sanding" so much as polishing, because 2000-2500 grit paper isn't going to do more than lightly polish hardened steel, but that can be enough to smooth out a rough spot.
If it's a burr or rough spot on the sear beak or inside the liner hole, that would require disassembly to fix.
Another commonly used technique for making it easier to fire a switchblade (lifting the sear out of the blades catch-hole), is to fill the catch-hole with white lithium grease (something I learned from Mr. DeShivs). You might want to try the grease before sanding the catch hole, but if you decide to polish the inside of the catch-hole later, you'll need to really clean out the grease.
Another possibility is if the sear/rocker is loose (pin not peened tight enough), that can cause the sear/rocker to become misaligned in the handle cavity and cause binding against the handle, particularly if there isn't a lot of clearance in the cavity.
Switchblades can be tricky, temperamental creatures. The smallest flaw can cause malfunctions. It can be difficult to locate the source (particularly if a person is inexperienced), and both locating the source, and fixing the knife, often requires disassembly (then reassembly), which is a whole other level of difficulty.
And on the subject of lubrication- some oil works better than others. Some can actually gum up the pivot and interfere with opening. From my experience switchblades like very thin oil. I use Quick Release oil in the pivots of all of my switchblades.
Switchblades can be both fun, and frustrating. Good luck.
Avatar- Ti-lite auto conversion. Video- https://www.youtube.com/watch?v=q79nia-_DzU
My Youtube knife channel- https://www.youtube.com/@killgar2621/videos
My Youtube knife channel- https://www.youtube.com/@killgar2621/videos
-
Madmarco
- Gold Tier
- Posts: 12039
- Joined: Wed May 20, 2020 12:09 am
- Location: Smack dab in the middle of Canada
Re: How to take out rivets without damaging the horn handles
Excellent tutorial, KG.
You used all the correct terms that I can never seem to find when I'm explaining something about an auto.
It seems your skills go well beyond making knives, but making knives is definitely your forte'.
You used all the correct terms that I can never seem to find when I'm explaining something about an auto.
It seems your skills go well beyond making knives, but making knives is definitely your forte'.
-
Killgar
- Posts: 291
- Joined: Mon May 23, 2022 6:28 am
Re: How to take out rivets without damaging the horn handles
Thanks MM. Most of what I've learned about the mechanics of switchblades comes from experience.
On a few occasions, early in my switchblade building, I completed what I thought was final assembly on a knife, believing I had done everything right. I closed the knife, pressed the button, expecting a glorious opening, and then....nothing, the button wouldn't go down. Quite a disappointing moment.
So then I'd take the knife apart trying to figure out where I went wrong (that's where all-screw construction really pays off), I'd check the sear beak, and there I find the slightest little burr on the beak, a burr so faint that I can barely feel it with my thumbnail. After carefully polishing the beak with some 2500 grit sandpaper, I reassemble, and the knife functions as it should.
It really is amazing how the slightest burr here or there can cause a total malfunction, but it happens. It also took me a bit of trial and error to learn about the striations left in the blade catch-hole from the drill bit as well.
Avatar- Ti-lite auto conversion. Video- https://www.youtube.com/watch?v=q79nia-_DzU
My Youtube knife channel- https://www.youtube.com/@killgar2621/videos
My Youtube knife channel- https://www.youtube.com/@killgar2621/videos
-
Clack
- Posts: 52
- Joined: Wed Jul 26, 2023 10:09 pm
Re: How to take out rivets without damaging the horn handles
I understand exactly what you mean and as another member mentioned it, you described every single mechanical part and the way of working very well.Killgar wrote: ↑Sun Sep 17, 2023 6:42 pm Trying to diagnose a switchblade online is difficult to say the least.
You say that sometimes you cant push the button down, is this only when the knife is closed, or are there times when you cannot push it down when the knife is open?
If it only happens when the knife is closed, when the blade is pressing against the sear, and the sear is pressing against the inside of the sear-hole in the liner, then there could be a burr or rough spot either on the sear beak, inside the liner sear-hole, or inside the blades catch-hole that is causing the sear to occasionally bind. It only takes the slightest imperfection in one of these areas to cause binding.
If the blade catch-hole was drilled, then it will have circular/corkscrew-like striations inside it. Those striations can sometimes grip onto the sear beak when the blade is under pressure from the spring. This can cause binding that prevents the sear from rising (and the button being pressed). If the cause of the problem is roughness in the blade catch-hole, then it may be possible to smooth out the inside of the hole using very fine sandpaper wrapped around the back end of a drill bit of appropriate size, twisting the paper-wrapped bit around inside the hole. I would likely start with 2000 grit and finish with 2500 grit. Such fine grits are available in the paint sections of auto care stores. I wouldn't call this "sanding" so much as polishing, because 2000-2500 grit paper isn't going to do more than lightly polish hardened steel, but that can be enough to smooth out a rough spot.
If it's a burr or rough spot on the sear beak or inside the liner hole, that would require disassembly to fix.
Another commonly used technique for making it easier to fire a switchblade (lifting the sear out of the blades catch-hole), is to fill the catch-hole with white lithium grease (something I learned from Mr. DeShivs). You might want to try the grease before sanding the catch hole, but if you decide to polish the inside of the catch-hole later, you'll need to really clean out the grease.
Another possibility is if the sear/rocker is loose (pin not peened tight enough), that can cause the sear/rocker to become misaligned in the handle cavity and cause binding against the handle, particularly if there isn't a lot of clearance in the cavity.
Switchblades can be tricky, temperamental creatures. The smallest flaw can cause malfunctions. It can be difficult to locate the source (particularly if a person is inexperienced), and both locating the source, and fixing the knife, often requires disassembly (then reassembly), which is a whole other level of difficulty.
And on the subject of lubrication- some oil works better than others. Some can actually gum up the pivot and interfere with opening. From my experience switchblades like very thin oil. I use Quick Release oil in the pivots of all of my switchblades.
Switchblades can be both fun, and frustrating. Good luck.
With blade open, pushing the button up and down i can feel the sear rubbing agains the liner sear-hole and often catches a little bit as i hear two ''clicks'' when releasing the button. So i can understand that when the sear is under sideway tension, it can get stuck. However, believe it or not, i pressed some tissue in the blade catch-hole and now the blade fires pretty well without having to press the button al the way down. It released the blade pretty good. I inspected the hole and you can feel a little bit of roughness because of the drilling. But the tissue also helps that the sear wont go down all the way in to the blade catch-hole.
Smoothing it out would be a pretty difficult job as its a small hole by maybe 3.5mm?
So my theory is that there is a small burr on the top end of the sear or inside the liner sear-hole. The tissue in the catch-hole prevents the sear to drop all the way down so the burr part stays above the catching edge of liner sear-hole.
It will be hard to spot the exact burr location and a operation from outside will be pretty impossible i think.
- Attachments
-