The best laid plans of mice and men.........

Ask questions and share your knowlege about custom knives. Make sure to show off your stuff if you are a knife maker or collector.
Post Reply
User avatar
Meridian_Mike
Posts: 5041
Joined: Mon Apr 21, 2014 8:36 pm
Location: Mississippi

The best laid plans of mice and men.........

Post by Meridian_Mike »

Well, just when you think you have it figured out...... YOU DON'T....
I have a 2 sided dilemma here...

1). My spring making skills are greatly lacking. I need some suggestions or INSTRUCTION mostly about how to make a GOOD SPRING.

2). I think I have a design problem with this knife I am trying to make.

Take a look....
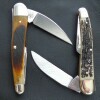
Here is the knife I am trying to duplicate.... since my X ray vision doesn't work with pictures, I made my best guess at how this knife works.
JHH 6.jpg
Here is where the rubber met the road..... when you get the metal in position you find out real quick that THIS spring is TOO SHORT and TOO FAT...
Here is the mechanism mocked up.
mock up.JPG
Well, when I put the liners on and opened the knife, the fat spring broke..... well well... don't get discouraged..... just make another one...
Well, I did..... I figured "OK, the last one was too fat, so I will make a thinner one..... NOPE... here is the result....
Broken spring #2.JPG
SO... I see 2 problems here...
ONE... my spring making abilities are TERRIBLE at best. I am trying to make the springs in my stove.
In Stove.JPG
I can get the metal up to temp to become non magnetic. That is my gauge. Then, quench in burned motor oil. From there... into my wife's oven at 350 for an hour (while sausage balls are cooking) and then oven off and let it cool down before spring comes out....

TWO... The design makes the spring too short. I think the design I have come up with is poor. I might need to change the design....

I need some suggestions.... Y'all got any?
I've heard the suggestions and opinions are like certain parts of our anatomy..... EVERYBODY has one!


::uc::
"Life is tough.... but it's tougher if you're stupid."....John Wayne
User avatar
jerryd6818
Posts: 39458
Joined: Sun Jan 04, 2009 5:23 am
Location: Farther down the road.

Re: The best laid plans of mice and men.........

Post by jerryd6818 »

Well, dadgummed Mike. It sure LOOKS like it oughta work. Sorry, no suggestions and even if I had one you would probably be better off not trying to implement it.
Forged on the anvil of discipline.
The Few. The Proud.
Jerry D.

This country has become more about sub-groups than about it's unity as a nation.

"The #72 pattern has got to be pretty close to the perfect knife."
--T.J. Murphy 2012
doglegg
Gold Tier
Gold Tier
Posts: 23940
Joined: Mon Sep 18, 2017 2:35 am
Location: Grand Prairie, Texas

Re: The best laid plans of mice and men.........

Post by doglegg »

Mike, my suggestions are kinda like Jerry's, they would just set you back some. ::dang:: ::dang::
Mustang11
Posts: 12
Joined: Tue Jan 23, 2018 4:42 am

Re: The best laid plans of mice and men.........

Post by Mustang11 »

If you're going for plain functionality instead of historic authenticity why not try a lock bar like the one used in the Buck 110 etc. Make the part you're using as a spring into a spacer and install lockbar. Just an idea
User avatar
Doc B
Posts: 3700
Joined: Fri Aug 10, 2018 10:57 pm
Location: San Antonio

Re: The best laid plans of mice and men.........

Post by Doc B »

:( I still can't fathom how a "normal" spring works, over the long term, without metal fatigue and resultant fracture. Obviously heat treat and design...but I still scratch my head. I have no answer...but it looks like you're making nice progress on the project!!!! Let us know what works.
Heretical Refurb / Mods of cheap old folders, since late 2018
User avatar
Colonel26
Bronze Tier
Bronze Tier
Posts: 10404
Joined: Sun Jul 01, 2012 3:35 am
Location: Kentucky

Re: The best laid plans of mice and men.........

Post by Colonel26 »

Mike, I am probably WAY off base here as I e done just enough reading about this to be dangerous.

But, do you think maybe you’re getting the springs too hard with your initial heat treatment? The reading I’ve done, little mind you, doesn’t take the heat up that high initially, more of a cherry red, and tempers to a heat blued color.

I’m probably wrong here, but that’s wht struck me when reading your process.

Wht metal are you using for the springs?
“There are things in the old Book which I may not be able to explain, but I fully accept it as the infallible word of God, and receive its teachings as inspired by the Holy Spirit.”
Robert E. Lee
User avatar
Meridian_Mike
Posts: 5041
Joined: Mon Apr 21, 2014 8:36 pm
Location: Mississippi

Re: The best laid plans of mice and men.........

Post by Meridian_Mike »

Colonel26 wrote:Mike, I am probably WAY off base here as I e done just enough reading about this to be dangerous.

But, do you think maybe you’re getting the springs too hard with your initial heat treatment? The reading I’ve done, little mind you, doesn’t take the heat up that high initially, more of a cherry red, and tempers to a heat blued color.

I’m probably wrong here, but that’s wht struck me when reading your process.

Wht metal are you using for the springs?
I need to check into that..... I could be going too hot. my whole procedure could be wrong...... ::shrug::

I am using 1095 I got from Jantz.
"Life is tough.... but it's tougher if you're stupid."....John Wayne
Tony_Wood
Posts: 1368
Joined: Sat Jan 06, 2018 5:06 pm

Re: The best laid plans of mice and men.........

Post by Tony_Wood »

Mike, try this...

Harden your spring at non magnetic.
Temper it in the oven for a couple of cycles with a water quench in between...350-400 degrees.
Then take a soldering torch and draw it back even more.
Hold the end that contacts the lock up with pliers, keep that end dipped in water to keep it cool, apply heat to the far end and watch the color travel down to the spring end. Dip in water as necessary to keep the lock up end cool. The metal will turn blue and the blue color will travel down the spring.
Stop the blue 1/4 inch from the end.

This keeps the lock end hardened, but allows the spring to spring without breaking.

Hope this makes sense.
https://m.facebook.com/sheepsfootknives/?ref=bookmarks

Instagram: #sheepsfootknivesbytwood
User avatar
Meridian_Mike
Posts: 5041
Joined: Mon Apr 21, 2014 8:36 pm
Location: Mississippi

Re: The best laid plans of mice and men.........

Post by Meridian_Mike »

Tony_Wood wrote:Mike, try this...

Harden your spring at non magnetic.
Temper it in the oven for a couple of cycles with a water quench in between...350-400 degrees.
Then take a soldering torch and draw it back even more.
Hold the end that contacts the lock up with pliers, keep that end dipped in water to keep it cool, apply heat to the far end and watch the color travel down to the spring end. Dip in water as necessary to keep the lock up end cool. The metal will turn blue and the blue color will travel down the spring.
Stop the blue 1/4 inch from the end.

This keeps the lock end hardened, but allows the spring to spring without breaking.

Hope this makes sense.
Thanks so much Tony! I am going to give this a try.

Mike
::tu::
"Life is tough.... but it's tougher if you're stupid."....John Wayne
User avatar
Colonel26
Bronze Tier
Bronze Tier
Posts: 10404
Joined: Sun Jul 01, 2012 3:35 am
Location: Kentucky

Re: The best laid plans of mice and men.........

Post by Colonel26 »

Tony_Wood wrote:Mike, try this...

Harden your spring at non magnetic.
Temper it in the oven for a couple of cycles with a water quench in between...350-400 degrees.
Then take a soldering torch and draw it back even more.
Hold the end that contacts the lock up with pliers, keep that end dipped in water to keep it cool, apply heat to the far end and watch the color travel down to the spring end. Dip in water as necessary to keep the lock up end cool. The metal will turn blue and the blue color will travel down the spring.
Stop the blue 1/4 inch from the end.

This keeps the lock end hardened, but allows the spring to spring without breaking.

Hope this makes sense.
Thanks for that information Tony. That makes perfect sense. I had read about the blue color before. I’ve seen videos of gunsmiths making springs for old guns tempering them to blue too. I appreciate the tutorial on how to do it.
“There are things in the old Book which I may not be able to explain, but I fully accept it as the infallible word of God, and receive its teachings as inspired by the Holy Spirit.”
Robert E. Lee
User avatar
muskrat man
Gold Tier
Gold Tier
Posts: 5684
Joined: Fri Jun 30, 2006 4:04 am
Location: Ohio
Contact:

Re: The best laid plans of mice and men.........

Post by muskrat man »

excuse the crude photochop but here is where i would be at with the project, separate spring and spring holder. pre tempered spring stock can be bought fro any knife supply houses and this design is much easier to replace in the event of breakage and is easily tuneable . if you're set on tempering your own springs bring to cherry red and oil quench, then draw back to blue 3 times with a propane torch quenching in water each time
Attachments
Broken spring #2.JPG
Custom knives, repair, restoration & embellishment
Certified Hubertus, Taylor, & Schrade repairman past and present
http://www.muskratmanknives.com
https://www.facebook.com/Muskratmanknives
User avatar
Meridian_Mike
Posts: 5041
Joined: Mon Apr 21, 2014 8:36 pm
Location: Mississippi

Re: The best laid plans of mice and men.........

Post by Meridian_Mike »

muskrat man wrote:excuse the crude photochop but here is where i would be at with the project, separate spring and spring holder. pre tempered spring stock can be bought fro any knife supply houses and this design is much easier to replace in the event of breakage and is easily tuneable . if you're set on tempering your own springs bring to cherry red and oil quench, then draw back to blue 3 times with a propane torch quenching in water each time
OK.... I see where you are headed...... Thanks for that suggestion!
I need to check into the pre-tempered spring stock.

Mike
"Life is tough.... but it's tougher if you're stupid."....John Wayne
User avatar
Dinadan
Silver Tier
Silver Tier
Posts: 3647
Joined: Sat Dec 29, 2012 2:34 am
Location: Coastal Alabama

Re: The best laid plans of mice and men.........

Post by Dinadan »

muskrat man wrote:excuse the crude photochop but here is where i would be at with the project, separate spring and spring holder.
I thought about using a piece of an old clock spring in a similar way, but I could not figure a way to attach the spring securely so I did not chime in. I was thinking that since you need a lot of flex but not a lot of strength something like a clock spring might work.
Mel
User avatar
Meridian_Mike
Posts: 5041
Joined: Mon Apr 21, 2014 8:36 pm
Location: Mississippi

Re: The best laid plans of mice and men.........

Post by Meridian_Mike »

Dinadan wrote:
muskrat man wrote:excuse the crude photochop but here is where i would be at with the project, separate spring and spring holder.
I thought about using a piece of an old clock spring in a similar way, but I could not figure a way to attach the spring securely so I did not chime in. I was thinking that since you need a lot of flex but not a lot of strength something like a clock spring might work.
I am thinking you can gut a slot in the metal pieces and slide the spring into the slots.

(Just thinking out loud here....)
"Life is tough.... but it's tougher if you're stupid."....John Wayne
User avatar
muskrat man
Gold Tier
Gold Tier
Posts: 5684
Joined: Fri Jun 30, 2006 4:04 am
Location: Ohio
Contact:

Re: The best laid plans of mice and men.........

Post by muskrat man »

Meridian_Mike wrote:
Dinadan wrote:
muskrat man wrote:excuse the crude photochop but here is where i would be at with the project, separate spring and spring holder.
I thought about using a piece of an old clock spring in a similar way, but I could not figure a way to attach the spring securely so I did not chime in. I was thinking that since you need a lot of flex but not a lot of strength something like a clock spring might work.
I am thinking you can gut a slot in the metal pieces and slide the spring into the slots.

(Just thinking out loud here....)
Yep!
Custom knives, repair, restoration & embellishment
Certified Hubertus, Taylor, & Schrade repairman past and present
http://www.muskratmanknives.com
https://www.facebook.com/Muskratmanknives
Post Reply

Return to “Custom Knives”